
Web site Design in MS FrontPage
step 2: creating a layout using tables
Rule 1 in web design: a page must fit in the browser window horizontally. Users are used to scrolling down, but if they also need to scroll across the page will be inconvenient to use. Users are likely to miss important information because it isn't visible. It is the mark of a poorly designed page if it doesn't fit from left to right.
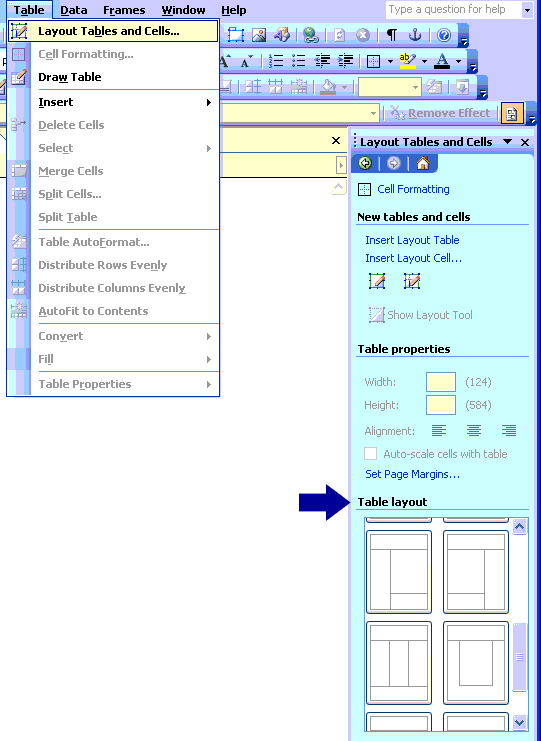
- Create a new page file » new. The layout tables and cells pane should appear on the left of the screen.
-
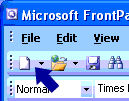
*You can also use the new icon on the toolbar to create a new page. - Choose a table layout from the options and
click to insert it into your page.
- Decide what the properties of your main table will be. These properties will determine how your web page fits on a screen; but which type of screen? The most common resolution is 800 x 600 pixels, but larger sizes are becoming more popular.
view tables of screen size & resolution comparisons
- As you can see, there is a dazzling array of
sizes. There are basically 2 approaches to
the screen resolution problem:
a) Use a fixed layout; set your screen width to 750 pixels; this will fit on most screens.
b) Use a 'liquid' layout; set your screen width to 100% or other percentage value.
To set the height and width go to table » table properties » table and enter the desired values in the specify width & specify height fields.
*Setting a value in cell spacing will leave a gap between each cell
*Setting a value in cell padding will indent the text from the cell borders
*I prefer to set these values to 0
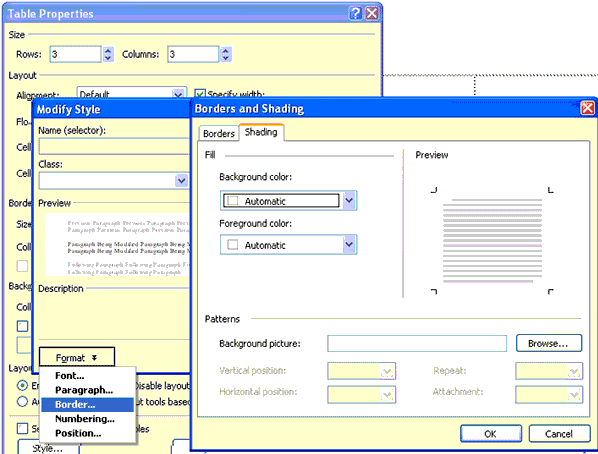
*You can also set the table background colour and border here, but lets use the style feature
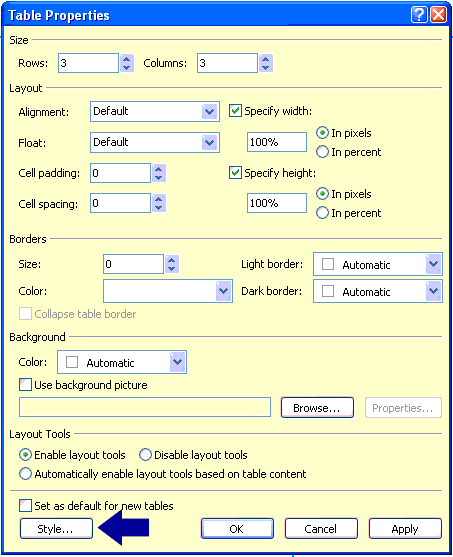
- Click the style button. Select
the format drop down list to format the
borders and background colours.
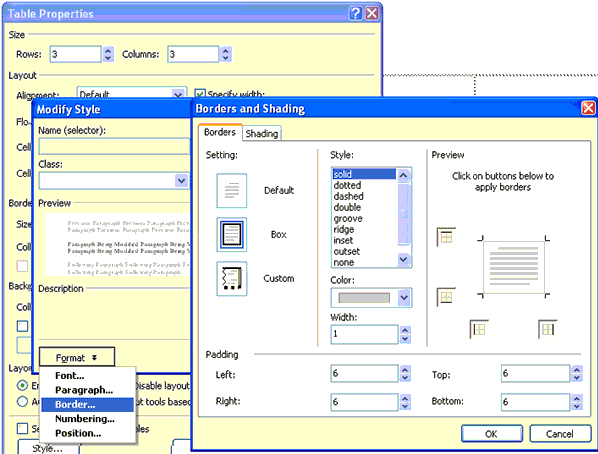
- Use the shading tab to set the
background colour and background picture
if desired
*Using repeat » repeat-x will make an image repeat horizontally
*Using repeat » repeat-y will make an image repeat horizontally
*Use no repeat to display a single image
*Use vertical position & horizontal position to align the image
*Attachment (scroll or fixed) determine whether the image remains fixed as the user scrolls down the page
- Click the style button. Select the format drop down list to format
the borders and background colours.

- Use the shading tab to set the background colour and background
picture if desired
*Using repeat » repeat-x will make an image repeat horizontally
*Using repeat » repeat-y will make an image repeat horizontally
*Use no repeat to display a single image
*Use vertical position & horizontal position to align the image
*Attachment (scroll or fixed) determine whether the image remains fixed as the user scrolls down the page
*using a repeating background image can give the illusion of highly graphic borders while only using very small images. This gives the same effect as a single, large background image but dramatically reduces file size and page loading time.

This screen shows the Borders and Shading properties under Table Properties » Style » Border. Specify a background image or colour then set the properties for vertical and horizontal position and repeat x and y.
